
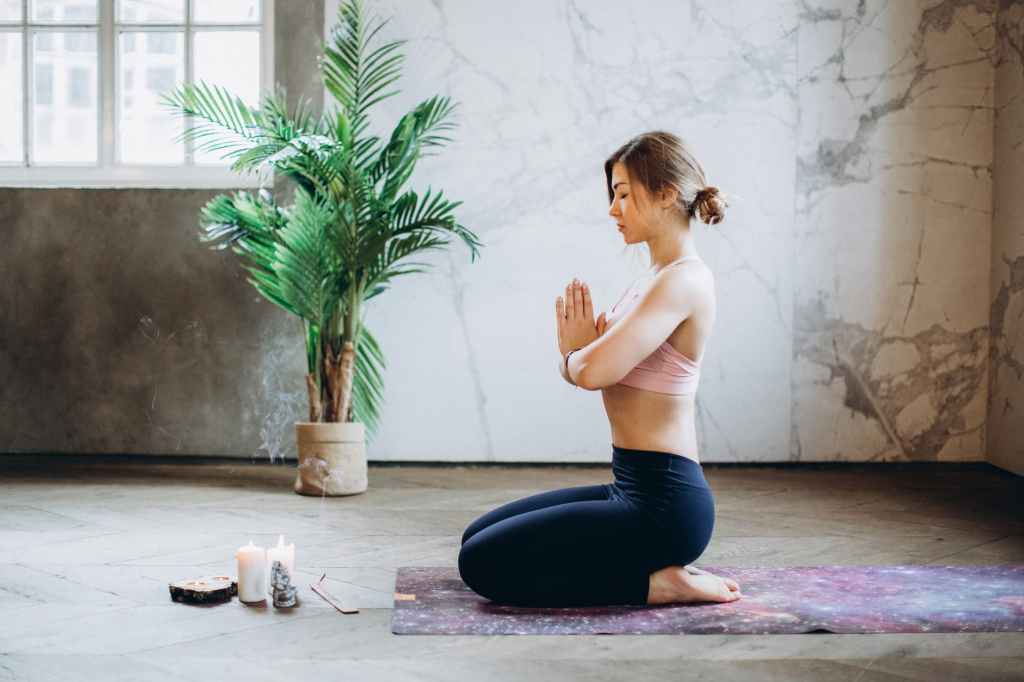
We’ve all heard that gentle body movement, such as yoga, can help our bodies be stronger, more flexible, and calmer, thanks to the holding of poses and stress management that comes from the mind-body connection.
Even though we know this to be factual (even Harvard has written studies on the amazing health benefits you can get from yoga), not all of us necessarily feel like yoga is right for us. Whether it’s because of the inaccessibility of boutique yoga studios, the air of wellness that often surrounds yoga, or maybe stretching just isn’t your thing. Whatever the reason, yoga truly can make a positive impact on managing all sorts of pain, be it chronic pain from endometriosis, period cramping, or digestive cramping from IBS.
Now, before you run to your local yoga studio, there are some things to consider. For starters, you don’t have to spend any money to partake in the practice of yoga. Yup, you read that right: no money at all. Not even wifi or phone costs! You can do slow, or fast, yoga flows anywhere, at any time, with nothing but the body you are in. That being said, we at pip enjoy being taken through our yoga practice by an instructor, be it in a heated studio, our local gym, or our living room with the instruction of a teacher through a Youtube video or app. It allows us to take the guesswork out of creating the flow’s sequence, but that doesn’t mean we couldn’t do it totally cost-free at home.
This Blog Post will take you through some of the physiological reasons why yoga can be such a beneficial tool for battling your pain, as well as some of our (and science’s) favourite poses you can do at home – totally cost-free – should you want to give the centuries-old practice a chance.
What is yoga?
Yoga is a mind-body and exercise practice that combines breath control, meditation/mindfulness, and controlled movements to stretch and strengthen all muscles in your body. Yoga has been in the world for thousands of years, originating in northern India over 5,000 years ago. There are many different types of yoga, from slow restorative to fast-paced vinyasa yoga. A favourite at pip is Hatha, which lies somewhere in the middle. Yoga practice in a studio typically lasts from 45 to 90 minutes, but any time length of yoga can be beneficial, even 10 to 20 minutes at home.
Typically, yoga begins with breathing exercises to signal to the body that it can relax. Deep breathing can also help free the mind of any distractions so you can focus on your yoga practice. Yoga breathwork is used to control and anchor movements. When you inhale, blood goes to your heart and lungs. When you exhale, your heart relaxes slightly, signalling relaxation and safety. This is one of the reasons why in my yoga practices, longer exhales are used; the longer the exhale, the more relaxing.
Yoga poses, asanas, and the overall flow of the practice incorporate seated, standing, and prone postures. Some postures are held for a few seconds to a few minutes, depending on the style of yoga being done and the desired effects of the pose. While in a posture, ensuring proper body alignment and breathing into the stretch is very important. That being said, it’s equally important not to push your body farther than it wants to go. Remember that each side of your body is different, and every day is different too. Just because you can touch your toes fully in a forward fold Tuesday doesn’t mean your body can do the same thing on Thursday. While you do exert energy in yoga – especially in faster-paced flows, where you can expect to sweat! – you aren’t supposed to feel pain, so be sure to keep a conscious note of how your body feels in each pose and to stop at any point you feel pain. Each pose can be intensified if wanted, based on how you feel that day and how much you practice. At the end of your practice, savasana, laying flat on your back is the final resting pose, and is typically held for a few minutes to let the practice soak in.
What is the physiology of yoga for chronic illness and pain?
Let’s make this very clear: yoga is not a cure for your chronic illness and pain. It will not, and cannot, cure your endo or make your IBS disappear. And while we wish it could, anyone who suggests yoga can cure anything does not have your best interests at heart. What yoga can do is supplement your treatment plan, bring some relief to the pain you’re experiencing, and help you de-stress, even if it’s just in the moment. Whether you do 10 minutes a week of yoga on your bedroom floor, or practice hot yoga 5 times a week in a studio, only you can know how different poses affect your body. Don’t be afraid to back off a pose if you feel you need to and rest in child’s pose until you feel like you can engage again, no matter how enthusiastic the instructor may be. Also, if you practice yoga in person at a studio or gym, don’t be afraid to let the instructor know what you’re experiencing so they can provide you guidance on modifications.
Gentle yoga has been shown in research to decrease inflammation in the body by increasing blood flow and flexibility. Yoga practice and breathing can assist with pelvic floor health, which is one of the reasons it’s so helpful for chronic illnesses affecting women. As you breathe, your pelvic floor muscles descend and ascend, which can help relax and strengthen the muscles in the pelvic area. If you have endo, this can be super helpful as depending on where your endo is, your body can be inflamed throughout. By connecting the movement with your breath, you can signal to your body that it is safe, allowing the fight or flight response to not be so triggered.
Yoga poses to do at home for chronic pain
As we said at the beginning of this blog post: you can do yoga at no cost in the comfort of your own home – or anywhere really! You don’t even need a yoga mat! While having a mat is of course welcome, you can simply practice on your floor (you can even place a towel on the ground to use it as a mat to give you some cushion from the hard ground). At pip, we love to be in a dark room with the door closed and a small lamp on near us and play soft, meditation music in the background. You can even find us doing a few poses in our office when we feel like slowing down and easing some back or abdominal pain.
Here are our favourite poses for easing chronic pain, which you can do separately or in a sequenced flow.
1. Pelvic tilts and circles
Starting in “easy pose” – sitting with a straight back and crossed legs – with your hands resting gently on your knees, eyes closed should you like, start tilting your pelvis forward, shining your chest up and out with your inhale, and tilting back, rounding the shoulders and spine gently, with the exhale. Following your breath, do this a few times. Then, circle your pelvis is slow, gentle circles, doing a few times each way.
2. Cat-Cow
Come into “tabletop” – on all fours, hands under shoulders and knees hip distance apart, spine nice and long – and following your breath, do a few cat-cow sequences. Breathing in, come into cow, deeply while curving your lower back and bringing your head up, tilting your pelvis up. Then, breathing out, round the shoulder and spine, dip your head down, and come into cat. We like to keep our eyes closed and follow our breath for around 5 or 6 sequences of cat-cow.
3. Thread the needle
When back in neutral tabletop, take a deep breath and raise the right arm and lift it all the way up, your chest and head following, opening up the right side body. With your exhale, thread your right arm under your left, resting the right side of your face on the ground. Hold this pose for 3 to 5 breaths. Then, come back to tabletop and repeat on the left side.
4. Rag doll / Forward fold
From tabletop, make your way to standing. With a deep breath, bring your arms up over your head then swan dive into a forward fold. Let your head and arms hand heavy, rooting down into your feet to protect all the weight from being on your low back. To make the stretch deeper, you can hang onto each elbow. Feel free to gently sway side-to-side if it feels good. Placing your hands on your shins, you can breathe into a flat back, then let it go back into rag doll. Try doing this flow between rag doll and flat back a few times if it feels good.
5. Side bend
Root down in your feet and roll your body all the way up to standing. Take a deep breath in and raise your hands up over your head. Take a hold of one wrist and bend into a side twist. Do the other side. Feel free to do this more than once on each side! Feel the side body open up, and send some fresh, deep breaths in the ribs. It feels amazing, especially after sitting at a desk all day!
6. Goddess
From standing, put your feet super wide, like you’re in Triangle Pose. Your feet and body should be facing the same way. Breathe in deeply and sit down into a sumo squat. You can have your hands on your hips, in prayer at your heart, or above your head in a T-position – whichever feels best! Breathe out and tilt your pelvis forward, so it feels as though it is sitting directly under you. Hold for a few breaths. Goddess pose may be too much exertion for you as it activates the glutes, hamstrings, core, and low back. If it’s too much, you can stick to pelvic tilts in a seated pose.
7. Figure Four
Make your way onto your back with both feet on the floor, knees bent hip distance or slightly wider apart. Life your right leg, placing your ankle on your bent left knee. You can play with this pose, letting your legs fall left to right, lifting your left leg, and even grabbing your left leg to give some tension to the stretch. This stretch is amazing because it opens up the hip flexor and pelvic area with a wide variety of degrees, depending on how you move. Hold for as short or as long as you’d like, then switch sides.
8. Happy Baby
Bring your feet back to the ground, take a deep breath and reach your hands and legs up to meet each other. Knees bent as much as they need to be, grab hold of the soles of your feet and breath into the leg and hip stretch. Feel free to rock side to side if you’d like. Hold for 3 to 5 deep breaths, more if you need to.
9. Reclined/sitting butterfly
If this final stretch feels too much reclined, you can do it seated. Either on your back or sitting in easy pose, connect your feet, moving them closer or further away from your body to deepen or relax the stretch. Breathe into this stretch and hold it for as long or as short as you’d like. If you’re sitting in butterfly, you can hinge at the hips and fold over your lap.
10. Savasana
Finish your flow off in final resting pose, letting the stretches sink into your body. Close your eyes if you’d like and take some deep, steady breaths. When you’re ready – be it in 1 minute or 10 minutes – come to seated and close your practice.
Twists to add for digestion
If IBS, GI tract issues, food sensitivities, or endo/period bloat is affecting you, you can add in some twists. Twisting in yoga – be it through seated, standing, or laying down poses – stimulates the peristalsis, which is the involuntary engagement of the smooth muscles in your digestive tract which move food along. By stimulating the peristalsis through twists and yogic breathing, the peristalsis is encouraged to relax, which in turn can aid proper digestion.
You can do these at any point during the flow above (at pip, we like to do a twist at the beginning and end of our practice), or at any point, during the day if you feel it could help.
- For a simple twist, lay on your back, feet to the floor, knees bent. Hug your knees into your chest before letting both knees fall to the left. Your hands can be out in T shape if it feels good. Keep your shoulders pressed to the ground, and feel free to look the opposite way. Breathe into this twist for about 5 or more deep breaths. Then, twist to the other side.
- For a deeper twist in Figure Four, you can bring your legs – while still in the position – to one side. Hold for a few breaths, and do the other side.

One response to “Blog Post: Can Yoga Actually Help my Chronic Pelvic Pain?”
[…] that is easy on the body and it’s inflammation. Be sure to check out our blog post on yoga for pelvic pain that includes some twists which can aid in […]
LikeLike